Difference between revisions of "CoolMasterNet FAQ"
| Line 187: | Line 187: | ||
== Troubleshooting == | == Troubleshooting == | ||
=== White Screen after power up === | === White Screen after power up === | ||
| + | [[File:white-screen.jpg]] | ||
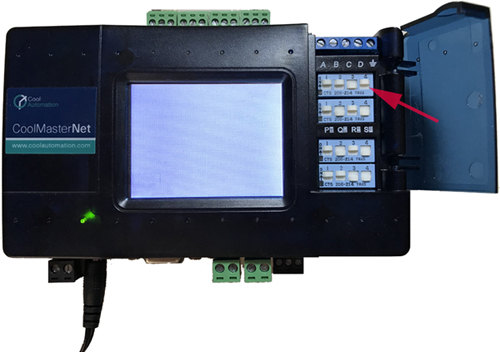
* Move the DIP switch P4 to ON position and back to OFF position a number of times. This is to make sure the DIP switch is properly shorted. Make sure the DIP switch P4 is finally OFF. Reset the power again. | * Move the DIP switch P4 to ON position and back to OFF position a number of times. This is to make sure the DIP switch is properly shorted. Make sure the DIP switch P4 is finally OFF. Reset the power again. | ||
* Disconnect power supply and connect CoolMasterNet to USB to power it from USB host. If USB connection eliminates the "white screen" issue, the problem is with a power supply. Try to find another compatible power supply. | * Disconnect power supply and connect CoolMasterNet to USB to power it from USB host. If USB connection eliminates the "white screen" issue, the problem is with a power supply. Try to find another compatible power supply. | ||
Latest revision as of 22:09, 4 October 2019
General
How to make connection from PC
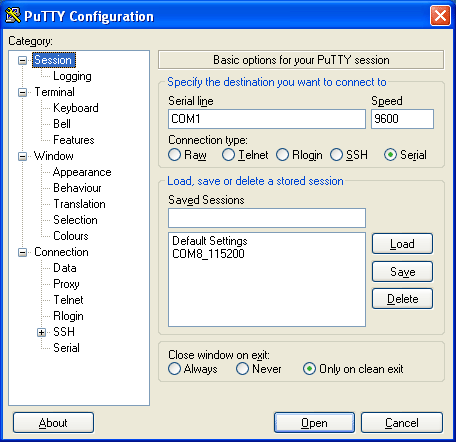
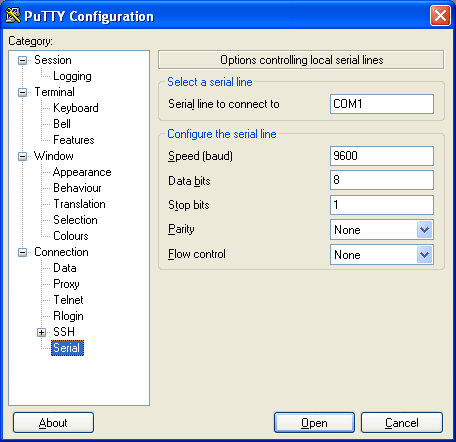
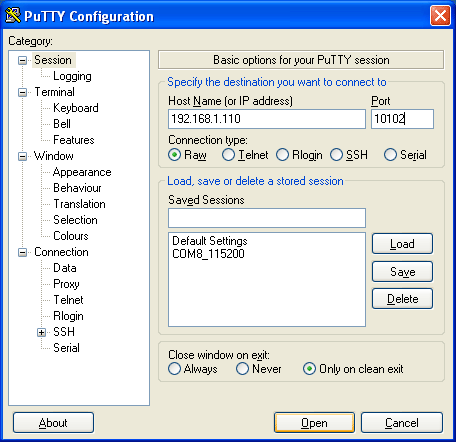
We suggest to use Putty - a simple and free terminal program. Connection can be done via RS232 or TCP/IP.
How do I change a name of the Indoor unit on LCD screen
Below command will give Indoor unit L1.101 a name "Room 1"
| >props L1.101 name Room 1 |
To remove name and return to L1.101
| >props L1.101 name_ |
Space after name is vital.
How do I make Indoor unit invisible on LCD screen
Below command will make Indoor unit L1.101 invisible on LCD screen
| >props L1.101 visible 0 |
To make it back visible:
| >props L1.101 visible 1 |
Take into account the fact that invisibility is related only to LCD screen and it does not affect ls command output
How do I set Indoor unit set temperature limits
Below command will limit Indoor unit L1.101 set temperature range to 18C..26C
| >props L1.101 tlim 18 26 |
CoolMasterNet will force set temperature to be inside the limits even if it is changed external by central controller or local wired controller.
To eliminate limits:
| >props L1.101 tlim 0 0 |
How to change or disable CoolMasterNet startup melody
To get list of supported melodies run:
| >set melody 0 - Murka |
Default melody is '0'. To change melody use below command:
| >set melody 5 OK |
This specific melody code '5' will make CoolMasterNet silent.
Networking
How do I change IP address and/or other network settings
IP network configuration is made with ifconfig command described in PRM document.
HVAC Connection
How to provide DC output on line L1
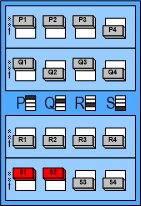
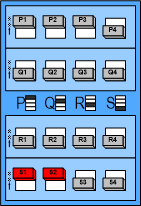
For Daikin or Mitsubishi Electric Non—VRV/VRF equipment, DC voltage supply by CoolMasterNet might be required for proper operation. Before enabling DC output from CoolMasterNet make sure there is no DC voltage on HVAC communication line. If no DC voltage detected: Daikin 14-16V DC, Mitsubishi 28-30V DC, do following:
- Disconnect CoolMasterNet from power and HVAC line.
- Change the dip switches S1 and S2 as shown below.
| Daikin | Mitsubishi Electric |
|---|---|
|
|
- Turn ON the power for CoolMasterNet and connect it to HVAC line.
- Issue below command:
| >line DCOUT L1 + |
and power reset CoolMasterNet
Daikin
Daikin wired remote weekly schedule has gone
Local Daikin wired remotes have weekly schedule function. When any central controller is connected (CoolMasterNet, DCS302, I-Touch, e.t.c) – this function is disabled by default. In BRC1D, you can set the 1B.5 field setting to 01, and get the schedule working again, even if central controller is connected.
Modbus RTU
How to enable Modbus RTU on line L3
Below command will enable Modbus RTU functionality on line L3.
| >line type L3 CG5 |
CG5 stands for "CoolGate5", which is a new Modbus RTU implementation in CoolMasterNet (see details). There is also a CG4 option which will enable an implementation backward compatible with a legacy "CoolGate" device.
How to query or change Modbus Slave Address
Modbus Slave Address is available via line command.
| >line
L1: SA U00/G05 myid:E5 Simul(5) |
To change Modbus Slave Address use line command as shown below:
| >line myid L3 50 |
This command will set Modbus Slave Address 0x50(hexadecimal)
CoolRemote
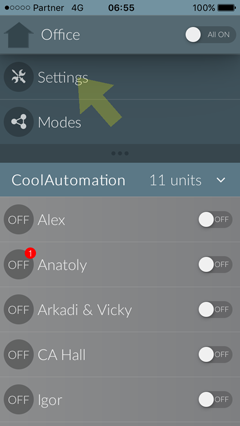
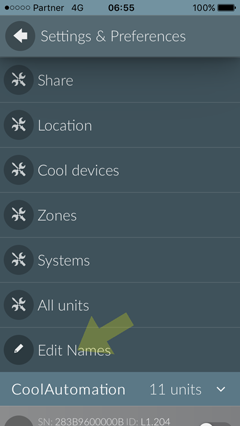
How to change names of Indoor Units (zones)
| STEP1: Tap/Click "Settings" icon | STEP2: Tap/Click "Edit Names" icon | STEP3: Edit names. Tap/Click Save |
|
|
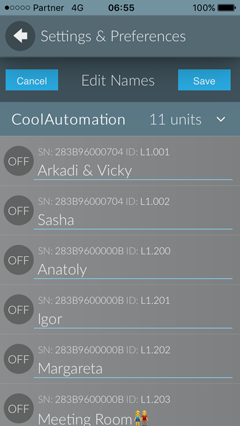
|
How to change Celsius/Fahrenheit temperature presentation
| STEP1: Tap/Click "Home" icon | STEP2: Tap/Click "User" icon | STEP3: Change "Temperature Scale" |
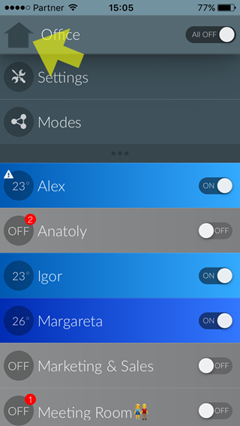
|
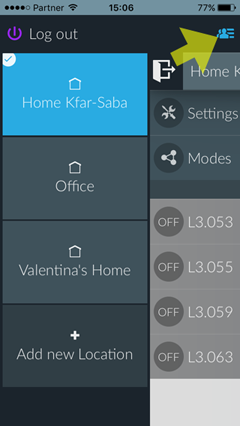
|
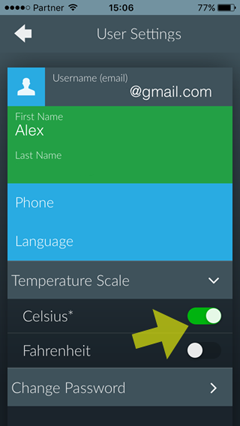
|
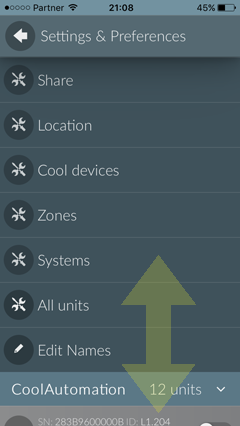
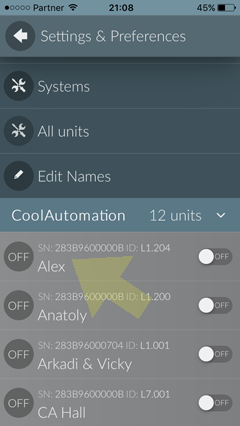
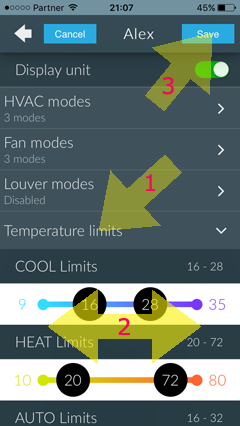
How to change setpoint temperature limits
| STEP1: Tap/Click "Settings" icon |
STEP2: Scroll the screen to reach desired indoor unit |
STEP3: Tap/Click on indoor unit |
STEP4: Tap/Click "Temperature limits" Change limits Tap/Click "Save" |

|
|
|
|
Troubleshooting
White Screen after power up
- Move the DIP switch P4 to ON position and back to OFF position a number of times. This is to make sure the DIP switch is properly shorted. Make sure the DIP switch P4 is finally OFF. Reset the power again.
- Disconnect power supply and connect CoolMasterNet to USB to power it from USB host. If USB connection eliminates the "white screen" issue, the problem is with a power supply. Try to find another compatible power supply.
