Difference between revisions of "ThermoPad FW Update"
Jump to navigation
Jump to search
| Line 7: | Line 7: | ||
# Power up ThermoPad and while in Boot mode, press the 'Start Update' button on TSUpdater tool | # Power up ThermoPad and while in Boot mode, press the 'Start Update' button on TSUpdater tool | ||
# Wait until update is done and disconnect the IR emitters | # Wait until update is done and disconnect the IR emitters | ||
| − | # Set calibration and defaults on ThermoPad (see [https://coolautomation.com/lib/doc/manual/CoolAutomation-Manual-ThermoPad-v0.9.pdf ThermoPad PRM] | + | # Set calibration and defaults on ThermoPad (see [https://coolautomation.com/lib/doc/manual/CoolAutomation-Manual-ThermoPad-v0.9.pdf ThermoPad PRM]) |
Revision as of 05:39, 19 April 2017
- Download and install the SUB-20 Driver and Package:
SUB-20 Driver
SUB-20 Package - Download and install the CoolAutomation SW Package:
CoolAutomation SW Package - Connect XDIMAX programmer box to PC with USB cable
- Connect IR emitters cord to programmer and place IR emitters on the ThermoPad's touch screen
- From Windows Start Menu Run CoolAutomation -> TSUpdater
- Load ThermoPad FW image:
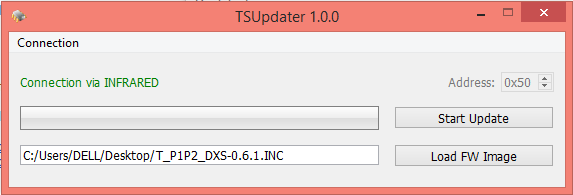
- Power up ThermoPad and while in Boot mode, press the 'Start Update' button on TSUpdater tool
- Wait until update is done and disconnect the IR emitters
- Set calibration and defaults on ThermoPad (see ThermoPad PRM)
